
How to Install Wainscoting Like a Pro
This Post May Contain Affiliate Links. Please Read Our Disclosure Policy.

Planning Our DIY
Table of Contents
Sketch out a plan for your Wainscoting.
There are many ways you can approach the trim in your room. You can create a half wall, you can stack vertical boxes, and the feature wall concept has gained popularity in recent years.
There are also endless options for the shape of your trim. A lot of professional wainscoting trim will include the installation of panels.
For this project, we did not use paneling. We decided to go with an elongated box that would help make the room appear larger.
Determine the number of boxes per wall and desired width of each box piece.
Calculate the outside box width with considerations for equal spacing in-between boxes and from wall edge. Measure the outside box height with consideration for equal spacing at top from ceiling and bottom from baseboard.
Our spacing is 3″ between each box and 4″ from the wall trim edge. We took down all measurements in the room including the height and width of the window and doors.
In order for your project to look professional and symmetrical, you’ll want to ensure the spacing is the same at the top and bottom. The space between the boxes should be the same as well but you can make minor adjustments if needed.

How to Install Wainscoting Trim
Use a miter saw to cut the four sides of the boxes (measuring length from outer edge), then use a miter saw to make 45 degree cuts for each corner.

Prepare your walls by repairing any holes or imperfections. We painted a fresh coat of satin paint prior to starting this project.
Start applying the trim going from the outside to the inside.
Using a small piece of wood that is cut to the size needed for the sides, top and bottom of the boxes, place it in between the boxes to ensure correct spacing.
Have your level handy to ensure each piece is level. Once the first box on each wall was created and we ensured it was level, it made the rest of the installation easier.
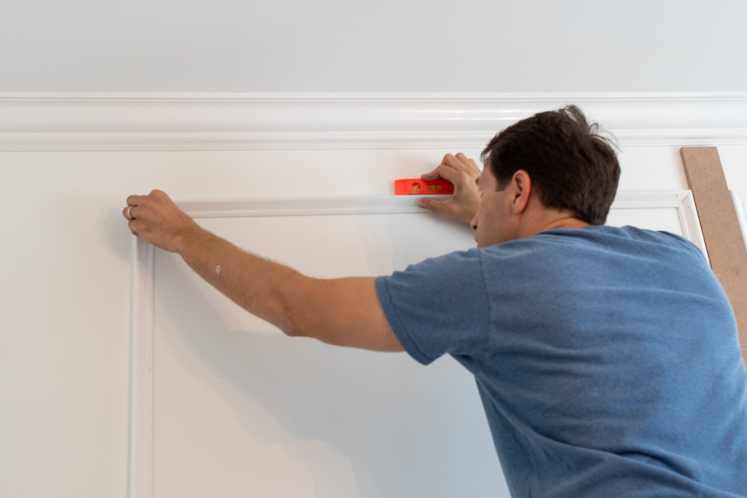
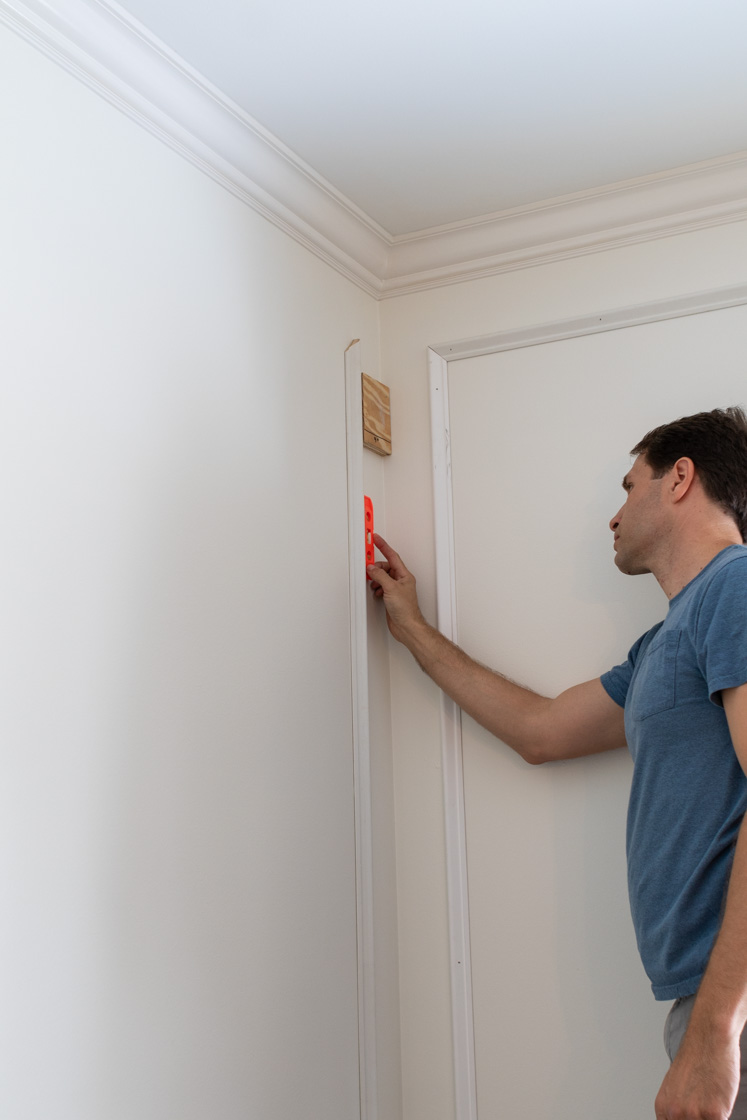
Apply a small bead-line of adhesive to the back of each box side piece prior to pressing against wall. Follow with the top and bottom pieces.
This part of the project is much easier if you have a second person to ensure pieces are level and spacing is correct. Ensure the corners fit together well, but keep in mind that you will be adding caulk and paint which will cover most imperfections.
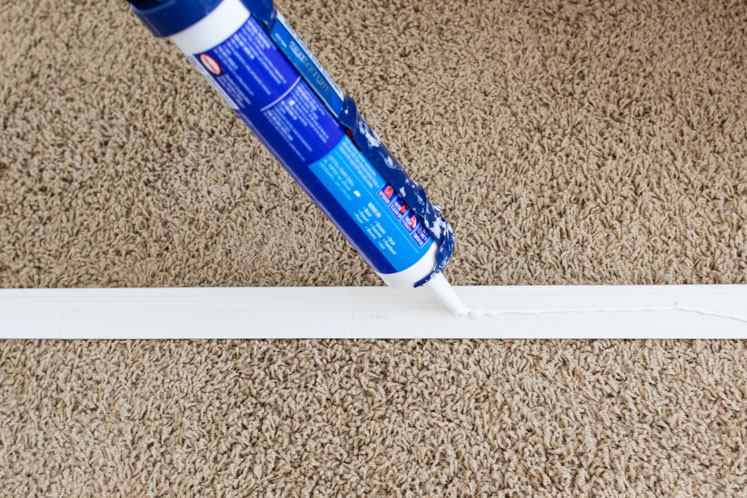

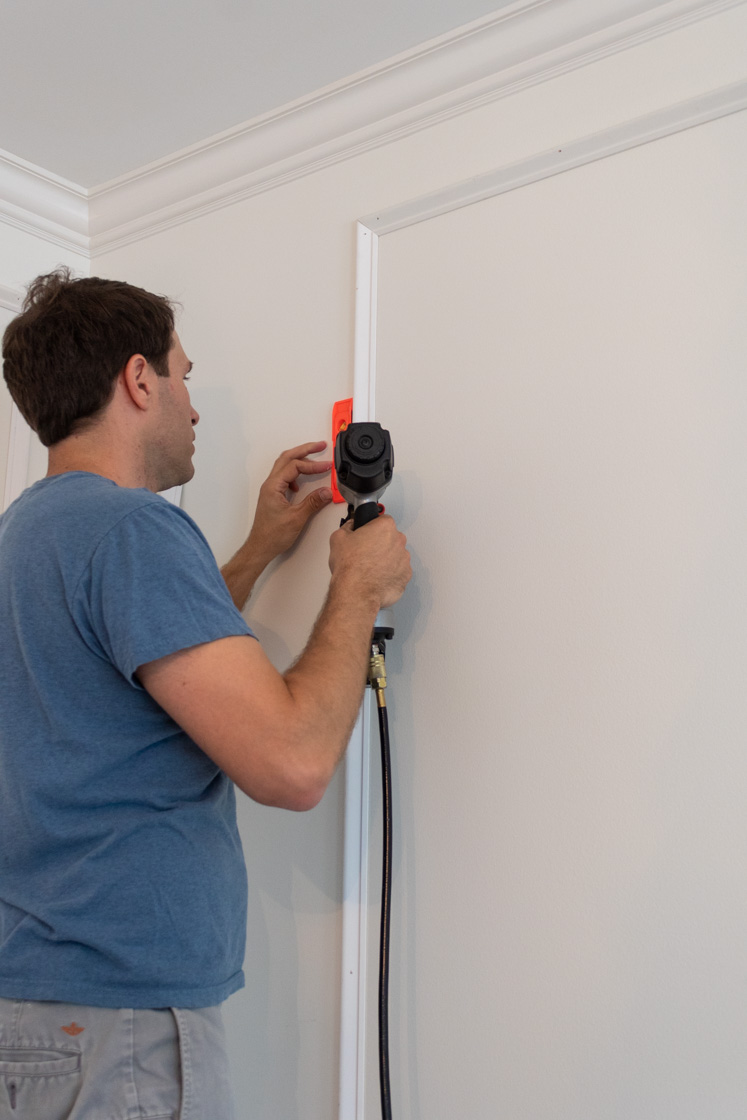
Use pneumatic 16-gauge nail gun to secure the box to the wall.
Place a nail every 12-18″ across each piece to further secure to trim to the wall.

Finishing Your Wainscoting Installation
Apply caulk to the inner edge and outer edge for smooth appearance. With a brush, apply paint to the trim.
After researching, we decided to add a coat of paint to the wainscoting trim in semi-gloss (the wall paint is satin) to give the trim a little extra sheen.
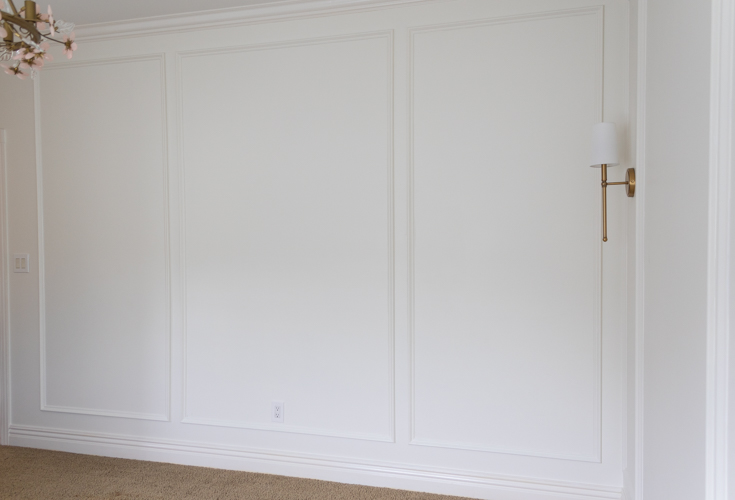

The end result is a custom wall that adds an incredible amount of beauty and detail to a room. I hope this DIY wainscoting tutorial was helpful and we’ve inspired you to try this DIY in your home. I know my girls will be enjoying this room for many years to come.
Thanks so much for stopping by today! For more inspiration, follow me on Instagram, Pinterest, LIKEt
Save this pin to your DIY or Home Decor Boards



Looks so great! Would you mind sharing what paint color you used for the walls and trim?
This turned out beautifully and those sconces are perfection!
Thank you! You are so kind!
Wow! Just wow!
It is beautiful. Can you share what size the trim is. I have been looking at Lowe’s and Home Depot and can not seem to find anything thin enough to make the picture frame wainscoting. Appreciate any help you can give me. Thank you for sharing. It is beautiful just like everything else you posted. You two are blessed with talent.
Beautiful! Could you share where you bought the center light fixture and the color of white you used for the walls? Thank you 🙂
Hi Melanie, I am Jen’s VA. Thanks for your comment. All her resources are on this post! https://jennifermaune.com/girls-bedroom-decor-ideas/ Jen loves Sherwin-Williams paint in the Emerald Paint line.
Hi can you share what dimensions the boxes are? I’m having trouble determining how many to fit per wall. Thank you