
DIY Floral Hoop Wreath
This Post May Contain Affiliate Links. Please Read Our Disclosure Policy.
I have another fun and simple DIY home decor project for you today. I had so much positive feedback on the DIY Flower Table Runner that I shared for my Valentine’s Day table, that I am excited to share several fun spring-themed tutorials for you all. This simple yet elegant floral hoop wreath is perfect for your spring home decor and it’s made from just a few supplies! Keep reading for the full tutorial, and I hope you will join me in making this fun floral hoop wreath!

This DIY spring floral hoop wreath post may contain affiliate links, click here to see our full disclosure.
Using a metal ring as the base of your wreath will make it durable against any outdoor weather. I also love the thinness of the ring, making this a new spin off the traditional embroidery hoop wreath.
Gather your supplies. When choosing your flowers, I recommend choosing both a variety of colors and textures to bring more interest to your hoop wreath and also add greenery to diversify. I keep a box of greenery I’ve pulled from flowers in other projects so I typically have something I can use on hand. I found my pink flowers from Michaels and they were half off in their spring floral sale!
MATERIALS
- 1 floral hoop
- gold spray paint
- floral wire
- scissors
- hot glue gun
- variety of faux flowers and greenery
- clear command hook

Directions
Using your gold spray paint, coat the hoop with a thin layer of paint. Repeat this step until the surface area on both sides is completely coated. Let dry.

The spray paint that I use dries in the sun very quickly, and I believe it is the perfect shade of metallic gold.

Now that your hoop is dry, you are ready to start building your wreath. Starting at the outer edges and working your way in, attach your greenery to the hoop, binding tightly with your floral wire.
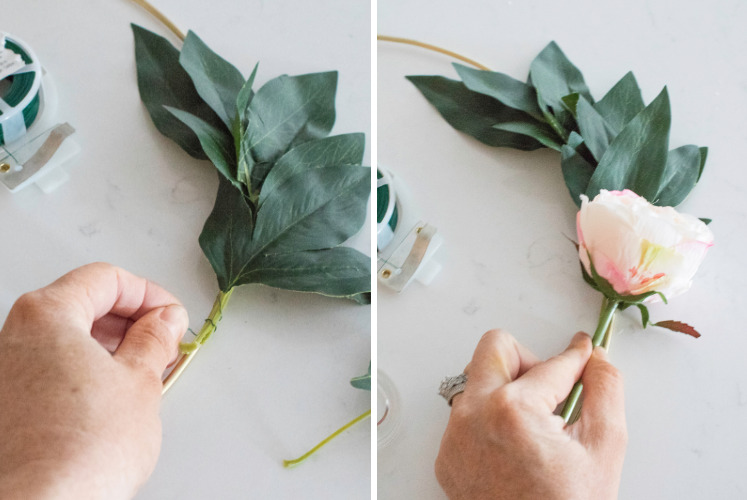
Place outer flowers next, leaving ample space for the featured flowers which will be centered in the middle. I added a darker pink flowers to create some contrast from the light pink and to bring in a little pop of color on the wreath.
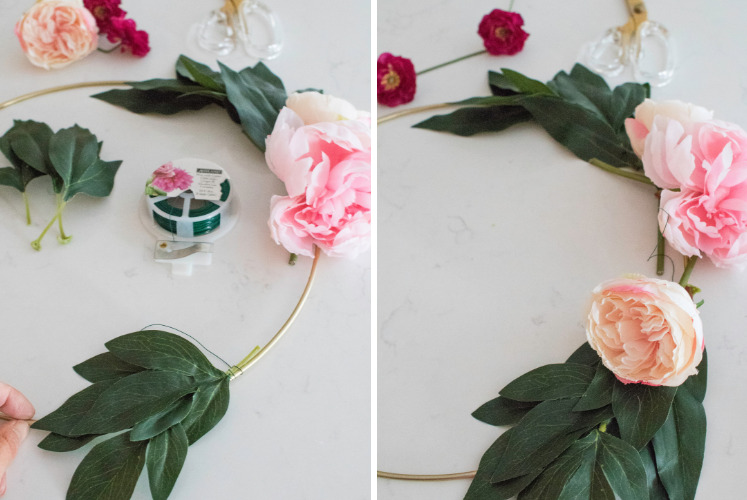
Add your flower to the other side, leaving room in the middle. You’ll want to be sure to bend the stem at the base of the flower so the flower is angled out.
Lastly, place your featured flowers in the center of the crescent. Using wire to secure them and a few dots of glue to hold them in place.

And here’s your finished product! You should now have a wreath that will last throughout spring (and summer if you like) and will hold up to the weather as well. This wreath could easily be done with fresh florals if you are planning a special occasion.

I used a clear command hook to hang my floral hoop wreath. If you haven’t used command hooks before, it’s important to follow the directions and the weight recommendations. Once you’ve applied the sticker to the correct side of the hook, press and hold firmly in place on the wall for 60 seconds. Then let it sit for an hour before using it to hang an object, or in this case your wreath. By letting it set, the adhesive is setting and should hold the appropriate weight without an issue if you give it time to fully set!
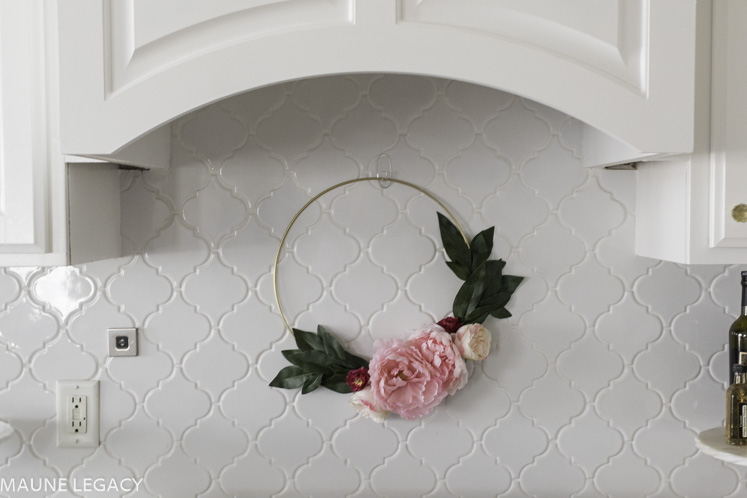

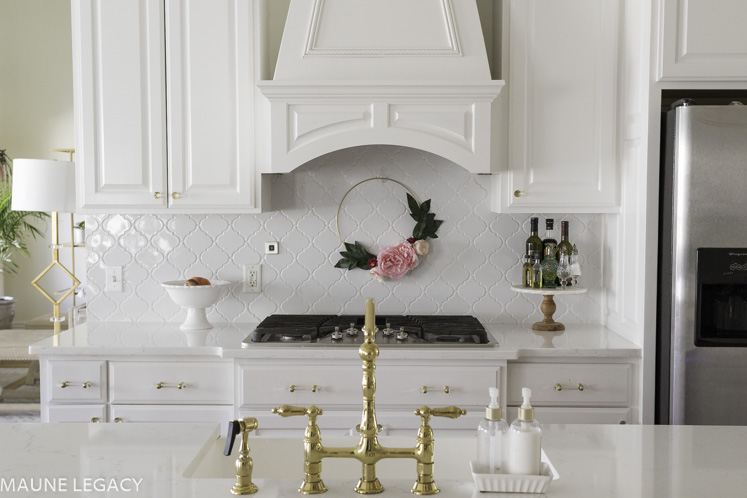
Don’t you think it’s the perfect touch of spring in our kitchen? I love it so much! I love the pop of pink, I love the touch of green in my kitchen as well. I love how the gold frame coordinates with the gold faucet and hardware in my kitchen, and I also love that it brings another bit of shimmer to this space. I may have to make two more for the front doors!
If you enjoyed this spring floral hoop wreath tutorial, I think you’ll also like the DIY flower table runner I shared for my Valentine’s table a few weeks ago. Also, if you haven’t yet, take a look at the spring-themed posts we’ve shared:
Thanks so much for stopping by today, I am always so appreciative of your time spent reading my posts and letting me know when you’ve tried one of my ideas! I have so much fun creating content in this little space and I hope it brings as much joy to your home! For more inspiration, follow me on Instagram, Pinterest, LIKEtoKNOW.it, Facebook, and Twitter. Here is a pin to save this for later!




What a beautiful wreath! I’m not the most crafty person in the world, but I just might make a trip to the store and give it a try.
Yes you could totally do this!
Oh gosh this wreath looks so pretty! I can’t imagine how perfect it would have made your Valentine’s day.
Yes, would be perfect for Valentine’s Day too!
I love your white kitchen I have to say and I like this DIY so much because it’s a great touch of colour. Have a lovely day x
Thank you! Yes, I love having a neutral palette and bringing in pops of color!
So simple and gorgeous! I love your photos by the way- nicely done!
Thanks so much!
It really is the perfect touch to your absolutely gorgeous kitchen. What an easy project to make such a big difference.
I typically have my cutting board in this space and I’ve loved having a little spring touch instead!
Omg I love the look of this! I am definitely going to try to recreate it.
Thank you! It was so easy!
This is so pretty and perfect for the space in my kitchen which is pretty mellow. Thanks for sharing.
Thank you!
This is beautiful and easy to make – gonna give it a try this weekend and perhaps put it in my lounge 🙂
I hope you were able to make it!
I really want to make this wreath now! It’s such a romantic, spring decor flair that can brighten and color a room without it being too gaudy! I can tell it truly personalizes a room in a beautiful way!
It is so simple too, thank you!
Thank you so much!
I absolutely love your do it yourself wreath It is so pretty and goes really well in your kitchen. 🙂
You are so kind, thank you!